This week I had the opportunity to use a Renault Scenic on my Renault Can Clip 157 for one hour.
this morning, we connected an interface box to plug in the fuse box:
This box is connected to the PC Clip with a long USB cord.
The case is in general on a trolley, but for a test drive, you can put it on the seat or passenger’s lap:
I got to spend some time on the injection computer and do some screenshots.
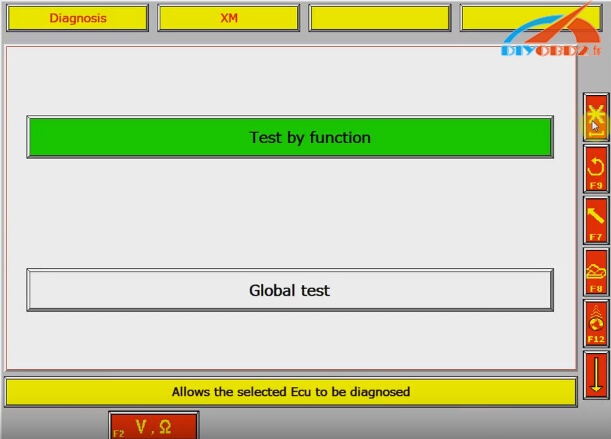
The injection menu looks like this:
One can visualize all kinds of parameters:
We can focus on one function, eg the clicking:
idle:
or wealth:
Regarding riichesse, I leaned on the famous Test supposed to initialize the adaptive correction:
dispersions can occur on the components of the injection system, and bring the correction to shift to 0 or 255, for the richness 1.
The adaptive correction shifts the injection mapping to center richness regulation to 128 and keep it a constant authority of correction towards the enrichment or impoverishment.
The adaptive correction richness regulation is in two parts:
– Adaptive correction for average and high engine loads (the # 30)
– Adaptive correction for idle speed and low engine loads (the # 31).
Adaptive corrections take 128 as the average value after initialization (erasing the memory) and have stops values.
Adaptive corrections work only hot engine loop phase (# 35 variable) and on a given manifold pressure range.
It is necessary that the engine was operating in loopback mode several pressure zones for that adaptive corrections are beginning to change to compensate for the engine operating richness dispersions.
It will be necessary, following a reboot of the computer (return to 128 for # 30 and # 31) to perform a specific test drive.
ROAD TEST
Conditions:
– Hot engine (coolant temperature> 70 ° C)
– Do not exceed an engine speed 4000 rev / min.
For this test, it is advisable from a fairly low engine speed, on the 3rd or 4th report with a very progressive acceleration to stabilize the desired pressure for 10 seconds in each zone (see table).
NOTE: For example, we will try to Beach No. 1, holding the average of 335 mbar for at least 10 seconds.
Following this test the adjustments will be operational.
The # 31 varies more significantly slow motion and low loads and # 30 on medium and heavy loads, but both work on all the manifold pressure ranges.
It will continue the test by driving in normal driving, flexible and varied over a distance of 5 to 10 km.
After the test, the values of # 30 and # 31. Initially 128, they should have changed. If not, repeat the test taking care to observe the test conditions.
—>
The adaptation parameters # 30 and # 31 were 114 and 104 at the beginning but I was fine to disconnect the battery 10 ‘, did not return to 128.
I still tried the test drive using the “registration status and settings” (see menu above). This function allows to choose up to 6 values and save them by choosing the sampling period and the recording time.
I retained:
– engine speed
– Intake pressure (measured by the vacuum sensor)
– The parameters # 30 and # 31 under test
– The correction parameter wealth # 35
– State regulation
It’s almost impossible mission to maintain the pressure ranges required for 10 “because of the Scenic accelerator pedal is soft and depression is extremely sensitive. I have noticed myself that the best is to find a steady climb and uncrowded so the car does not accelerate too much and maintain the fixed throttle. tough for Dutch garages.
Insisting well, I could save an evolution of the adaptive # 31
How to pick up a proper mileage correction tool for PSA group Peugeot or Citroen has been questioned among Peugeot and Citroen owners/mechanics. The top two respected PSA mileage correction tool are PSA BSI and DigiProg 3. What’s the difference between the two?
PSA BSI V1.2 is the business tool for Peugeot and Citroen. It can be used to read and write eeprom of BSI, programming new KM BSI and so on. It works on new Peugeot and Citroen models
OBDSTAR f-100 auto key programmer is a new and professional key tool released at diyobd2.fr. Free download the most detailed Mazda and Ford model list here to know more. (NOT:F100 temporarily can not do these two cars transfer table function 2011 Ford Edge and the 2016 Ford F-150 ecoboost)
Top 5 Reasons to Buy F-100 Mazda/Ford Key Programmer:
1. Support program Auto Keys and Smart Keys for Mazda and Ford.
2. All operations completed are required without password needed.
3. Supports the latest Mazda CX-3,CX-5,Mazda 2/3/6 and no need Pin code anymore.
4. Support odometer correction for part of Mazda/Ford/Jaguar/Land Rover
5. Original OBDSTAR product, update online on the official website.
Cheap
OBDSTAR F100 for US$189 supports odometer adjustment as well except key programming,but others only may apply to support immobilizer of Mazda and Ford.
Easy to operate
User experience is undesirable to similar products abroad because of no display and no guide for operation,but F100 is welcomed by perfect display and interaction.
Professional
It’s only for Mazda and Ford, including almost new and old models.
Cars appropriated for Immobilizer:
MAZDA
B Series
2007-
Key number
Program keys
All keys lost
BT50
2012 –
Program keys
Erase keys
All keys lost
Mazda 2
Type 1
With smart
Program keys
Erase keys
Program remote
Erase remote
Key number
Switch ignition on
Without smart
Key number
Program keys
All keys lost
Type2(2014-)
With smart
All smart keys lost
Add smart key
Switch ignition on
Mazda 3
Type 1
Key number
Program keys
All keys lost
Type 2
Key number
Program keys
All keys lost
Type 3(Axela)(2013-)
With smart
All smart keys lost
Add smart key
Switch ignition on
Mazda 5
Type 1
Key number
Program keys
All keys lost
Type 2
Key number
Program keys
All keys lost
Mazda 6
Type 1
With smart
Live data
Program keys
All keys lost
Program smart keys
Erase smart key
Without smart
Program keys
All keys lost
A spare key setting valid
A spare key setting invalid
Type 2(New Mazda 6)
With smart
All keys lost
All smart keys lost
Program smart keys
Without smart
All keys lost
Type 3(Atenza)(2013-)
With smart
All smart keys lost
Add smart key
Switch ignition on
Mazda 8
With smart
All keys lost
All smart keys lost
Program smart keys
Program keys
Without smart
Program keys
All keys lost
A spare key setting valid
A spare key setting invalid
Mazda CX-3
With smart
All smart keys lost
Add smart key
Switch ignition on
Mazda CX-5
With smart
All smart keys lost
Add smart key
Switch ignition on
Mazda CX-7
With smart
All keys lost
All smart keys lost
Program smart keys
Program keys
Without smart
Program keys
All keys lost
A spare key setting valid
A spare key setting invalid
Mazda CX-9
With smart
Live data
Program keys
All keys lost
Program remote
Erase remote
Without smart
2004 – 2009
Key number
Program keys
All keys lost
2009 –
Key number
Program keys
All keys lost
Mazda MX-5
2004 – 2009
Key number
Program keys
All keys lost
2009 –
Key number
Program keys
All keys lost
FORD
China Ford
Immobilizer
Ecosport
Program keys
Erase keys
All keys lost
Focus
Classic focus
Auto search
Manual selection
Type 1
All keys lost
Program keys
Program immobilizer and engine ECU
Type 2
Program keys
All keys lost
New focus
Type 1(2011-)
Program keys
Erase keys
Type 2(2014-)
Program keys
Erase keys
All keys lost
Escort
Live data
Add Keys
All keys lost
Fiesta
-2013
Program keys
Erase keys
2013-
Program keys
Erase keys
All keys lost
Escape
Program keys
Erase keys
All keys lost
Mondeo
Type 1
Program keys
Erase keys
All keys lost
Type 2
Program keys
Erase keys
All keys lost
S-Max
Type 1
Program keys
Erase keys
All keys lost
Type 2
Program keys
Erase keys
All keys lost
Transit
Live data
Program keys
All keys lost
New Mondeo
Live data
Add Keys
All keys lost
Edge
Key Quantity
Erase keys
Program keys
Smart key system
Ecosport
Program keys
All keys lost
Edge
-2014
Erase smart key
Program smart keys
2015-
Live data
Add Keys
All keys lost
Escape
Add smart key
Erase smart key
Fiesta
2012-
Program keys
All keys lost
2015
Program smart keys
All smart keys lost
Focus
Add smart key
Erase smart key
Mondeo
Type 1
All smart keys lost
Program smart keys
Type 2
All smart keys lost
Program smart keys
New Mondeo
Live data
Add Keys
All keys lost
USA Ford
Immobilizer
E250
All keys lost
Program keys
Program immobilizer and engine ECU
Edge
Key Quantity
Erase keys
Program keys
Expedition
Type 1
All keys lost
Type 2
Key Quantity
Erase keys
Program keys
F-150
Type 1
All keys lost
Type 2
Erase keys
Program keys
F-250
Type 1
All keys lost
Type 2
Erase keys
Program keys
F-350 SD
All keys lost
Mustang
2011-2014
Ranger
Program keys
Erase keys
All keys lost
Smart key system
Ecosport
Type 1
All smart keys lost
Program smart keys
Type 2
All smart keys lost
Program smart keys
Edge
Erase smart key
Program smart keys
Explorer 11-
Erase smart key
Program smart keys
F-150 11-
Erase smart key
Program smart keys
F-250 11-
Erase smart key
Program smart keys
Flex 13-
Erase smart key
Program smart keys
Mustang 2015-
Live data
Add Keys
All keys lost
Taurus 10-
Erase smart key
Program smart keys
LINCOLN
Smart key system
MKC 2014-
Live data
Add Keys
All keys lost
MKS
Erase smart key
Program smart keys
MKX
Erase smart key
Program smart keys
MKT
Erase smart key
Program smart keys
Immobilizer
MKX 07-
All keys lost
MKZ 07-09
All keys lost
Mark LT 05-07
All keys lost
08-09
All keys lost
Navigator
05-06
All keys lost
07-08
All keys lost
09-
All keys lost
Town car 05-10
All keys lost
Zephyr 07-
All keys lost
Remote
Navigator
Add remote
Erase remote
Cars appropriated for Odometer Adjustment/Correction:
Mazda
Auto identify
Manual Selection
M6(Atenza)
M3(Axela)
CX5
CX7
2010-
CX9
M2
M3
M5
M6
2005-2009
2009-2013
2014-
The top of the form
Ford
C-MAX
2012
Ecosport
type 1
type 2
Edge
2015-(Big color meter)
Mondeo
11-13
1 pointer color meter
2 pointer color meter
07-10
4 pointer color meter
Navigator
2007-2010
Mileage adjustment
New Mondeo
Big color meter
Small color meter
Color meter
S-MAX
2007-2010
Taurus
2015-(Big color meter)
LandRover
Discovery
Mileage adjustment
Evoque2011-
Data backup
Mileage adjustment
Data recovery
Freelander2 2013
Data backup
Mileage adjustment
Data recovery
Range rover
2010-
Mileage adjustment
Sprort 2014
Data backup
Mileage adjustment
Data recovery
Jaguar
F Series
Data backup
Mileage adjustment
Data recovery
XE Series
2015-
Data backup
Mileage adjustment
Data recovery
XJ Series
2010
Mileage adjustment
Following is an Introduction of similar products abroad:
Key Learning device for Ford/Mazda is intended to learn mechanical or proximity keys into Ford and Mazda vehicles.
Digimaster III msater not only is good at car odometer correction, but supports audio decoding, resetting airbage, ECU programming, reading PIN, and BMW key programming. You can free download Digimastar3-vehicle-list.xls (542.5K) to know more!
Following are the similarities and difference among FVDI, VVDI and SVDI Abrites Commander diagnostic & programming interfaces.
Similarities:
SVDI, FVDI and VVDI (including original AVDI) ABRITES Commanders share the similar functions, including basic diagnostic, key programming, pin code reading, mileage correction, airbag reset etc.
Differences:
Activation
FVDI and VVDI software: no need activation,
SVDI software contains: VW/Audi software, BMW commander software and tag key tool software, BMW Commander Software needs activation. Please send SVDI abrites commander serial number to seller for activation.
Language:
VVDI: English/Chinese
FVDI: English, Germany, Spanish, French, Russian, Italian, Danish, Czech, Chinese, and Bulgarian
SVDI: VW/Audi software support multi language, BMW commander software and tag key tool software covering English only. SVDI PSA software supports French, English and Turkish.
Update
SVDI VAG command and VVDI could upgrade via email and that is to say, you could send me your serial number for update file if there is any new software.
FVDI: Before update, you need provide the FVDI ID first, we will check if the ID is in the update list which can be update by email, if not in the list, please send back the FVDI commander to us for updating. Users are required to pay the shipping fee.
2015 Fvdi 6.3 update video guide
Vehicle coverage:
VVDI: VVDI covers VW /Audi vehicles
FVDI: VW/Audi, BMW, MINI, Benz, Smart, Maybach, Opel, Vauxhall, Peugeot, Citroen, Fiat, Alfa, Lancia, Renault, Porsche, Nissan, Infiniti, Toyota, Ford, Mazda, Jaguar, Chrysler, Mitsubishi, Land Rover, Lexus and so on
SVDI: VW/Audi, BMW/MINI
SVDI can work on both car and truck, while FVDI and VVDI can only support cars.
Conclusion:
VVDI is the best choice for VAG group. FVDI covers the most vehicles than VVDI and SVDI. SVDI is the newest one at cheapest price and with versatile functions.
Français SVDI PSA ABRITES Commander Peugeot Citroën PN008 Fonction Soutenue:
Ford IDS V100.01 was released at diyobd2.fr and tested working fine on both VCM II clone interface (Item No. SP177, SP177-1, SP177-C and SP177-G) and VXDIAG NANO adapter (Item No. SP239 and SP239-W).
I did a fresh install of windows XP 32bit (someone tested on Windows 7 32 bit). I have IDS updated to v100.01.
Make sure to adjust your settings in VMware. I used VMware workstation 10 to make this, but it is compatible with other VMware versions like VMware 12 Pro. A small edit in the VMX file will allow you to change the compatibility to an older version. I tested this on a Toshiba laptop. Also, when you load up the VMware image for the first time, it will ask you to active, there is a .txt file which contain both VMware workstation key and en_windows_xp.iso key.
Instructions:
1. Download the latest version Winrar. Must be at least version 5.30 or higher. It’s free from Winrar’s website
2. Extract the folder from the file to wherever you’d like.
3. Make sure to have VMware Workstation 12 installed. I didn’t test this on any other version, so I can’t say if it’ll work on any other version of VMware.
4. Open VMware and press Open Virtual Machine. Go to the folder where you extracted the rar file and select the .VMX file.
5. Configure the virtual hosting settings, if you’d like (RAM, Processors, etc)
6. Press “Power on this virtual machine”
7. When it asks about the network card, press “I Moved It”
8a. If you have an original / OEM VCM 1 or VCM 2, just plug it in to the computer. OEM drivers should automatically install.
8b. if you have a clone VCMII, install VX Manager on the desktop. After the install, choose VCMII Plus.
Then, connect your VCMII and let the drivers install.
I-2014 ACTIA Multidiag Access J2534 Pass Thru OBD2 deviceest bootable pour accéder à plusieurs unités de commande pour 23 marques mises à jour et de nouveaux systèmes 5300. Seigneur est un exemple de programme Mercedes Benz FM Module avant avec Multi-Di @ g Access J2534.
Un ordinateur portable fonctionnant sous Windows XP ous Windows 7 O / S
Comment programmer Benz FM avec MultiDiag J2534 :
Eh bien installer 2014.01V Multidiag ACTIA J2534 logiciel suivez les instructions vidéo
Connecter l’interface Multi-Di @ g Accès J2534 VCI avec le véhicule via la prise OBD
logiciel d’exécution
Choisir un fabricant de véhicules Mercedes Benz depuis l’écran principal
Sélectionnez le modèle de véhicule: Actros II-puis sélectionnez le module de l’unité de commande de la colonne de droite: module avant FM
Sélectionnez le type de moteur correct
Le prochain programme apportera Verschillende ou données techniques, comme le jeu d’embrayage libre, l’alésage du cylindre, la puissance maximale, la pression d’huile au ralenti, etc.
Sélectionnez l’option de compression radio >> inspection ou injection timing >> Batterie >> boulons Cylinder chaleur >> avant plaquette de frein Épaisseur minimum, confirmer le type de moteur
Sélectionnez FRESH INTER et-puis choisissez “Changer remorquée essieu hub lubrifiant et vérifier rouleaux coniques butée”
Ensuite, sélectionnez “Modifier transmission hydraulique du liquide de frein”
Appuyez sur l’icône de câblage, le Multi-Diag J2534 VCI programme affichera le schéma du module FM
Tirer télécharger la liste déroulante sous l’onglet COMPOSANT pour vérifier d’autres modules, capteur de hauteur, essieu avant, plaquette de frein capteur d’usure, roue droite, etc.
Suivez l’invite du système Jusqu’à La procédure se fait
Quittez le logiciel ACTIA Multi-diag et déconnecter l’ interface VCI du véhicule
Diagnostic Multidiag J2534 injection I-2014 Ford Mondeo:
Après avoir sélectionné le constructeur automobile, alors vous pouvez faire le diagnostic pour les différents menus proposés (selon les modèles des voitures):
Maintenance:
codes de diagnostic de tous les ordinateurs
intervalle de maintenance Reset
Modification des eaux usées
Lire/effacer calculatrices faute
Maintenance du filtre à particules
Air climatisé:
Le diagnostic de refroidissement de l’électronique
Lecture des paramètres circuit de refroidissement
servocommandes Test
Contrôle de la pollution:
Diagnostic du filtre à particules
Contrôle électronique des émissions de polluants
Contrôle de la sonde Lambda
Liaison au sol:
Configuration électronique de la taille des pneus,
Configuration électronique de pneus (hiver / été),
Réglage de la pression des pneus vannes
Le diagnostic et le traitement du choc à moteur
L’étalonnage du capteur d’angle volant (initialisation de l’angle de braquage)
Conseil:
La mise en œuvre des airbags de sécurité (verrouillage / déverrouillage)
Reconfiguration d’un nouveau calculateur Airbag
Diagnostic des calculateurs Airbag
Pare-brise du capteur de pluie (lecture et l’effacement de défaut)
Panneau d’essai et les activateurs de lumières
Cadre Phares au xénon
Radar arrière
Post-Equipement:
Mise en place de la radio
CD configuration du chargeur
Définition des alarmes
Configuration du coupleur
Configuration système de chargement de vélos
De freinage:
Diagnostic des calculateurs ABS, ESP
Diagnostic et débloquer les freins électriques
Rincer le système de freinage
Moteur:
Diagnostic d’un moteur calculateur d’injection (diesel, essence, flexfuel, etc ..)
Programmation des injecteurs
Configuration électronique de la vanne EGR
Xpert Mode:
Diagnostic de l’informatique de pointe
Configuration des fonctions de confort
Changer la langue de la planche de bord
des mesures physiques (option avec une sonde – non fourni)
Accès direct à toutes les fonctions de diagnostic
Clone MultiDiag ACTIA J2534 col Thru VCI a mis à jour pour I-2014 qui prend en charge 23 marques mises à jour et 5300 de nouveaux systèmes. Voici le 2014.01V VCI téléchargement du logiciel et l’installation guide gratuit.
Avant d’installer le logiciel VCI, fichier ouvert mot ISNT à lire les instructions d’installation
Désactiver connexion au réseau local et la connexion sans fil de travail, sinon le logiciel peut-être endommagé.
Ouvrir (1) dossier clé 04XXXX sur le CD et exécutez KeyUpdate. Puis confirmer et attendre le message correctement installé XXXXXX et OK
Ouvrir (2) DVD 1-2014 dossier, ouvert et installer exe d’installation.
Acceptez le contrat de licence
Le logiciel détecte VCI et remplir J2534 SN automatiquement.
Envoyez votre fournisseur code 31-xxxxxxxxxx pour obtenir le code d’activation et ensuite au code vierge
Mise à niveau de l’appareil 2014.01V MultiDiag J2534 OBD2 est le traitement qui va générer raccourci Multi-Diag sur le bureau
Sélectionnez “Non, je redémarrerai mon ordinateur plus tard” après la mise à jour est terminée. Appuyez sur Terminer
Parcourir et recherchez C: \ ACTIA \ portail, puis supprimer le fichier wegt.exe. Supprimez le fichier sur Corbeille ainsi.
Encore une fois ouvert (1) dossier clé 04XXXX sur le CD et exécutez KeyUpdate. Puis confirmer et attendre le message correctement installé XXXXXX et OK
Installez (3) xs-ime-pt-207p-workshop.exe sur le CD
Connectez le J2534 passe-thru avec le véhicule via le port OBD, puis connectez l’interface J2534 Multidiag avec l’ordinateur via le câble USB.
Le système vous demandera d’installer le pilote
Suivez le système invite à installer je ai moi + configuration XS PassThru
Attendre la communication de bien construit
Comfigure paramètres. Faites un clic droit sur Poste de travail >> Propriétés >> Matériel >> Gestionnaire de périphériques >> Je Me + ACTIA XS périphérique >> PassThru + XS pilote USB
Ouvrez le logiciel Multi-Diag sur le bureau
Cliquez sur Multi-Diag icône pour accueillir le menu de sélection du véhicule
Sélectionnez marque de véhicule et au modèle.
Sélectionnez Engine et cliquez sur tous les sysem, les fenêtres seront demandera “Votre abonnement Multi-Diag se terminera sous 0 jours”, cliquez sur la coche pour continuer
mise à jour de l’interface de communication est le traitement
Suivez les instructions du système, le fichier de sauvegarde à F: /SYSTEM.OLS/ACTIA/Driver VCI / PT1G
Multi-Diag VCI lancer l’initialisation, alors vous pouvez exécuter la fonction de diagnostic.
Maintenance, climatisation, contrôle de la pollution, liaison au sol, post-équipement, des vomissements, de la mode Xpert
Système d’exploitation
Win XP et Win7 32bit
Win XP et Win7 32bit
Win XP et Win 7 32 bits
Win XP
couverture du véhicule
23 Marques Mise à jour, 5300 nouveaux systèmes
26 marques de voitures Modèles – 3541 Nouveau système
19 marques de voitures Modèles – 190 Nouveau système:
La couverture moins de modèle
NOTE
Avis multidiag actia j2534:
1) La principale différence onder version différente perte sur la couverture du véhicule.Le Hogere la version du logiciel, les plus de véhicules qu’il couvre.2) V2014.01 et V2014.02 vont entrer le numéro automatisch VCI, mais une autre version doit entrer le numéro VCI manuellement.
(Atteint) Clone ACTIA Multi-Diag 2013 Ⅱdiagnostic pass-thru:
Comme il y a peu d’ informations et avis sur le clone ACTIA Access Multi-diag J2534Pass-thru, je décide de poster ma propre expérience. Logiciel ACTIA Multi-Diag J2534 2013-Ⅱ Affichage: Là où j’ACHETÉ le J2534 Pass-thru? Multi-diag VCI 2013 Ⅱ pass-thru (version française), € 2 05 pas d’ expédition inclus à partir dediyobd2.fr http://www.diyobd2.fr/wholesale/ii-2013-multidiag-access-j2534.html Combien de jours emballé?
Le paquet est arrivé à ma par 4 jours plus tard. Package waaronder unité principale VCI, DB25 OBD-2 Câble mâle, câble OBD2 OBD2, DIN6 câble USB et DIN6 à DB9F câble: Jour 1 après l’achat: Tout d’abord obtenir installé le logiciel et activé sur un ordinateur portable Vista avec volgende le guide d’installation vidéo:
Mais le dispositif ne herkennen le logiciel. Il n’y avait pas d’ordinateur communication tussen et le dispositif.
Ensuite , j’ai contacté le concessionnaire didobd2.fr, le technicien PREVIENT moi d’installer le logiciel Multi-diag VCI sur Windows XP ou Windows 7 ordinateur portable. Donc , je l’ ai installé sur VCI machine virtuelle XP chez acer portable et cela a fonctionné. NOTE: Il est très important de désactiver les logiciels anti-virus voordat institution VCI réseau et.
Renault Clio était mon premier sujet à observer, je connecte le Pro Multi-diag sous le connecteur OBD côté tableau de bord de pilotage. Il a aidé à effacer un mutlifunction reprogrammée code du capteur d’angle de braquage injecteur de code du moteur. Ensuite , VCI a permis de détecter certains paramètres. Seigneur quelques photos des tâches I. I figured out dat ACTIA J2534 multi-diag ne peut pas enregistrer seulement faire quelques diagnostic de base, mais ook écrire comme le testeur écu officiel pour les mises à jour, les pilotes.
La première expérience a été avec succès, mais je voortvloeien dat il a couru lent que ce que j’imagé. Je décidai donc de dissimuler l’appareil et vérifier ce que le circuit imprimé à l’intérieur de regard aime. Je googled et trouvé un petit tutoriel sur le forum MHHAUTO pour modifier le PCB pour le rendre fonctionne plus rapidement. Seigneur est le PCB modifié. Jour 2 après l’achat:
Deuxième véhicule Je l’ai testé était un client BMW MINI 2011. Un a pris sa voiture pour mon garage parce que la lumière de l’airbag constamment flashé. Je l’ai testé avec VCI mais aucun code stocké. Je suis arrivé quelques autres paramètres et tous très bien. Ensuite, je suis déconnecté de la batterie, et fait une remise à zéro de la batterie pendant une demi-heure. La lumière SRS partit enfin.
Je l’ai testé d’autres modèles de véhicules, Opel, BMW X5, Citroen C5, Pug 301, American Ford, Audi etc marques plus tard, principalement français et américains. Je ne sais pas comment il fonctionne sur les marques japonaises.
Je continue d’apprendre et de tester d’autres modèles et ajouterai SI NECESSAIRE.
One of the members in toyota-4runner.org/ forum highly recommends MPPS V16. He put in this way: “It’s really the newest professional ecu chip tuning tool, completely working through obd2 port, no need soldering or connecting cables, easy and high efficiency.”
Since MPPS V16 are so widely respect, Diyobd2.fr here offers MPP V16 ECU programmer software free download resources.
1) Plug the MPPS V16 cable into the vehicle OBD port which located under the driver side. Then connect the MPPS interface with the computer/laptop.
2) Insert the CD software into the computer/laptop and open the CD
3) Install and run update file
4) Select language and click “Next”
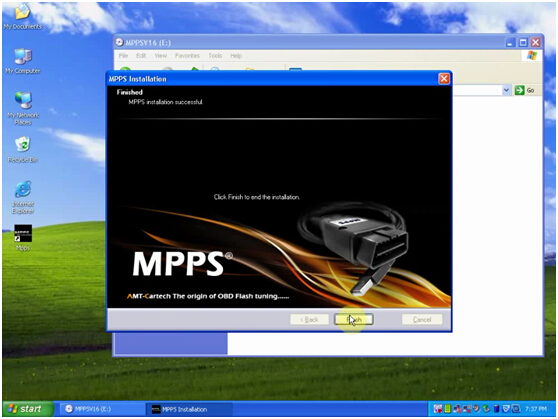
5) Accept license agreement. MPPS is installing, click Next.
6) Copy “loader” in the CD and paste it to the desktop
7) Delete “MPPS” shortcut on the desktop
8) Open “Found New Hardware Wizard” window. Follow the instructions. Finish installation of software for “Amt Flash”
Click “Finish” to continue.
9) Click “My Computer” – “Manage” – “Device Manager” – “Universal Serial Bus controllers”. If you see “Amt Flash”, it means the driver is successfully installed.
10) Open the MPPS application software.
Open “loader”.
Choose from Local Disk (C)
Open “MPPS” folder,
Choose MPPS.
Select Language, car Make, car Model and ECU type.
Click “EDC ID (F1)”.
Click “Read”.
Click “Write”.
Here is a tutorial video guide for you to refer:
Ceci est du support technique du site WebAppareil Diagnostic Auto:Free Download MPPS V16 ECU programmer Software